Published October 13, 2016 07:40PM
Kefir: The Fermented Milk Drink with Probiotic Prowess
Make your own nutrient-rich kefir at home for an immune-boosting, anytime snack.
See alsoGut Feeling: The Latest News Behind Probiotics and Prebiotics.
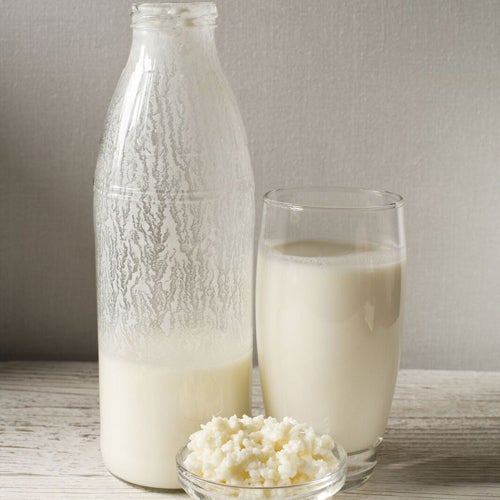
Kefir is popping up in the dairy cases of supermarkets across the country. But, what exactly is it?
“Kefir is a form of fermented milk that was thought to have originated in the Caucasus Mountains region around 100 BCE,” says Jill Ciciarelli, Holistic Health Counselor and author of Fermented: A Four-Season Approach to Paleo Probiotic Foods (Victory Belt Publishing, 2013.) “Shepherds transported goat’s milk in pouches and found that after a time it would ferment into a bubbly drink that made them feel great when they drank it,”
Health Benefits
In addition to its probiotic benefits, kefir is chock-full of vitamins – including vitamin A and B vitamins such as folate — as well as minerals like calcium and potassium. Vitamin A helps in keeping the immune system strong and organs work properly, while folate is important for our bodies to make DNA and for women of childbearing age to prevent common birth defects. Kefir is also rich in the amino acid tryptophan, which promotes a relaxation effect. While yogurt is typically made with just a few strains of bacteria or yeast, kefir is made with many different kinds yielding a stronger probiotic source than yogurt.
ADVERTISEMENT
Lactose is broken down during the fermentation process, making kefir easier to digest than milk. While the process of making kefir from milk has been around longer, water kefir is also becoming popular, particularly for those who avoid dairy.
Save Money. Make Kefir at Home.
People have been making kefir at home for centuries, some families passing down grains from generation to generation. The taste of the finished product depends on the amount of time you let your kefir ferment – less time will result in a sweeter, milder kefir, while more time gives you a sour, tangier-tasting drink. Making kefir at home has its benefits. “First and foremost, anything created in one’s own kitchen by one’s own hands is a special product and craft that any store-bought item cannot compete with,” Ciciarelli shared. Cost is another factor — homemade kefir is much less expensive than buying prepared kefir at the supermarket. You also get an opportunity to refine the taste to your preference and experiment with adding different fruits and flavorings.
See also Lemon & Herb Kefir Spread.
Getting your hands on kefir grains is easy. If you don’t have a friend or neighbor who is in to the craft, Ciciarelli recommends Cultures for Health for all types of fermentation supplies. “If you buy dehydrated kefir grains, they must be activated before use,” she explained. “To rehydrate, mix the dehydrated grains with a cup or so of fresh milk, cover loosely and let sit at room temperature for 24 hours. Strain the grains from the milk and repeat the process for five days or until the milk has started to coagulate in one 24-hour period and has a fresh but fermented smell to it. This means the grains are activated and ready for use.”
ADVERTISEMENT
Basic Milk Kefir
Makes: a little more than a quart
INGREDIENTS:
- 1 quart milk (the best quality milk you can find and afford)
- 1 tablespoon of kefir grains (see notes)
- 1 glass jar or bottle with a lid that will hold a quart of liquid plus a few inches of headspace to accommodate expansion
- 1 small plastic strainer
INSTRUCTIONS:
- Combine the milk and kefir grains in the jar. Cover tightly enough to prevent spillage when you gently shake it, but loose enough that the built-up carbon dioxide that is the result of the fermentation can escape.
- Let sit at room temperature for 12 to 48 hours depending on how tangy you like your kefir. Less time will result in a sweeter, milder kefir; more time will yield a sour, tangier beverage.
- Strain the kefir and reserve the grains for your next ferment.
- Refrigerate and enjoy.
Note: For best results, avoid storage in plastic containers and the use of metal strainers.
ADVERTISEMENT
Recipe by Jill Ciciarelli